If you’re like me, you’re always looking for ways to improve your video editing skills. I’m always on the lookout for new Premiere Pro tips, especially when it comes to fixing clipped audio. Proven Premiere Pro Tips for Fixing Clipped Audio are an essential way to get things done faster.
Clipped audio can be a real pain, but there are a few things you can do to fix it. In this blog post, I’m going to share some of the best Premiere Pro tips I’ve learned for fixing clipped audio.
- Check your audio levels before recording
- Use a pop filter to reduce plosives
- Use a windscreen to reduce wind noise
- Record in a quiet environment
- Use a directional microphone
- Use a shock mount to reduce handling noise
- Edit out any clipped audio
- Normalize your audio
- Apply noise reduction
- Use EQ to fix audio problems
- Automate your audio levels
- Render your audio

Check your audio levels before recording
Before you begin recording, make sure your audio levels are correct. Too low of a volume can cause clipped audio, while too high of a volume will produce distortion. Always adjust the volume before beginning to record to prevent any issues.
Use a pop filter to reduce plosives
When you’re working with audio, one of the most common problems is clipped audio. This means that the audio is too loud or too soft, and it can be a real pain to fix.
There are a few things you can do to try to fix clipped audio in Premiere Pro. First, make sure your audio levels are correct before you start recording. If your audio levels are off, it will be difficult to fix the problem later.
Another option is to use a pop filter. This will help reduce plosives, which are those pesky little pops that happen when air escapes from your mouth. Plosives can be really annoying, and using a pop filter can help reduce their impact on your audio.
Use a windscreen to reduce wind noise
There are a few ways to reduce wind noise in your audio recordings. One popular technique is to use a windscreen, which help to block out the sound of the incoming wind. Another common solution is to use a pop filter, which will reduce the popping sound that can be caused by gusts of air. However, each method has its own set of pros and cons. It’s important to choose the right option for your particular situation.
Record in a quiet environment
If you’re experiencing clipped audio in Premiere Pro, there are a few things you can do to fix the issue. First, try using a windscreen to reduce wind noise. If that doesn’t work, you can try using a noise reduction plugin. Finally, you can try using a different audio track or using a different codec.

Use a directional microphone
When you are recording audio for a video, it is important to use a directional microphone. A directional microphone will record sound coming from only one direction. This is ideal when you need to record someone speaking from one side of the camera frame, or when you want to capture an acoustic guitar playing in one specific direction.

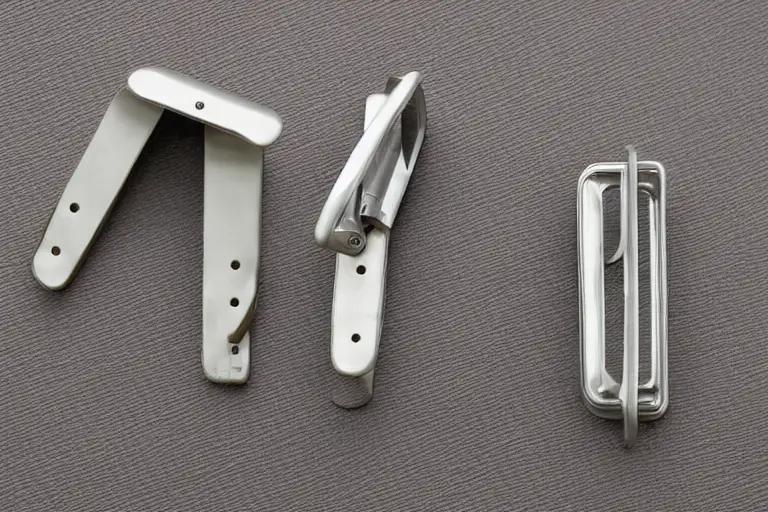
Use a shock mount to reduce handling noise
When handling a high-quality audio source like a microphone, unwanted noise can occur due to the physical contact between the device and your hands. Shock mounts can be used to reduce this type of noise, as well as increase the lifespan of your microphone by providing more stable support. Additionally, shock mounts can help you achieve a better sound quality when capturing audio from wider perspectives or in difficult acoustic environments.
Edit out any clipped audio
The Power of the Leveler
It can be frustrating when your audio clip is clipped or choppy. Luckily, there are a few easy solutions. The first step is to use a shock mount to reduce handling noise. This will help ensure that the audio is played without interruption. If the clipping occurs during editing, you can use Premiere Pro’s leveler function to fix it.
Adjusting Your Audio Levels
Fixing clipped audio can be a difficult task, but with a little know-how and some simple adjustments to your levels, you can get the desired results. First and foremost, use a shock mount when possible. This will help reduce handling noise, which can cause clipping in your audio files.
Next, make sure that your levels are adjusted correctly. Too high of a level can cause clipping (and potential distortion), while too low of a level may not be enough to fix the issue entirely.
Finally, if all else fails, you can use an editor such as Audacity or Sound Forge to remove the clip and restore the audio back to its original state.
Applying Effects to Clipped Audio
No matter how careful you are, clipped audio is always a possibility when editing video. Fortunately, there are a few quick and easy methods for fixing it.
Use a shock mount to reduce handling noise: A good way to reduce clipping is to use a shock mount. This essentially mounts your camera directly to the tripod or ground surface, preventing any movement from shaking the footage and causing clipped audio.
One downside of using a shock mount is that it can make your footage less portable; if you ever need to take your shot off-site, you’ll have to remove the mount first.
Applying Effects to Clipped Audio: If clipping is accidental or unavoidable, some simple effects can be applied in post-production to clean up the audio. For example, a de-clipper can be used to remove any ringing or hiss from the audio, while a noise reduction plugin can help to reduce any unwanted background noise.
Repairing Frequencies with the EQ
When an audio clip is clipped, the audio ends abruptly. This can be highly distracting and cause viewer confusion. There are a few methods you can use to fix clipped audio in Premiere Pro.
One method is to use a shock mount to reduce handling noise. By clipping the audio at the source, this reduces the amount of noise that gets into the file. Clips also tend to sound better when they’re trimmed using a professional editor like Adobe Premiere Pro, as their editing tools are tailored for removing noise and distortion from recordings.
If clipping isn’t an option or if it’s not severe enough, then you can try repairing frequencies with the equalizer. By restoring lost frequencies, you can restore part of the clip without having to trim it.

Normalize your audio
One of the most common issues Premiere Pro users face is clipped audio. Clipped audio can be a result of several things, but most often it’s caused by over-emphasizing certain frequencies in your audio clips. By correcting these frequencies you can help to restore your clips’ fidelity and make them sound more natural.
There are several ways to fix clipped audio in Premiere Pro, each with its own benefits and drawbacks. In this article we’ll cover four methods: using the EQ, normalizing waveforms with the waveform mixer, using reverse Dithering, and applying an overall compression layer.
EQing Audio
using the EQ is probably the simplest way to fix clipped audio. When you over-emphasize frequencies in your audio clip, they will start to clip at those points where the frequency waves overlap each other. To solve this issue, simply adjust the EQ on your clips until they’re sounding balanced again. This method is especially useful when clipping is caused by excessive highs or lows; by lowering or boosting specific frequencies you can correct for the issue without affecting other parts of your audio clip.
However,eqing can also have some serious drawbacks: if you apply too much EQ tonality may start to change the sound of your entire clip (especially if it’s a vocal track), and there’s a risk that you’ll lose clarity or vibrancy when trying to fix clipped audio with simple adjustments to EQ settings.
Using Waveform Mixers for Normalization
Another popular approach for fixing clipped audio is through waveform mixing – a technique which allows you to smooth out jagged edges in affected areas without altering other parts of your clip(s). To do this, simply add a waveform mixer curve so that it affects only those areas where clipping has occurred. The best way to find these areas is usually trial and error; experiment with different curves until you get something that looks fair and restores all of your clips’ fidelity while keeping their original dynamics intact.”
Apply noise reduction
Noise reduction is a vital part of video editing. You can use it to remove extraneous noises, like air conditioners or people talking, from your footage. It’s also good for fixing clipped audio. If you clip the audio at the beginning or end of a sentence, noise reduction can fix that issue.

Use EQ to fix audio problems
Audio problems can be difficult to fix and often require a combination of techniques. One common solution is to use equalization (EQ) to adjust the overall sound levels. There are many different EQ settings that can be used, so it’s important to find the right one for your specific situation. Here are some tips on how to use EQ:
- Start by turning off all of the noise reduction effects in Premiere Pro. This will help you better see the differences between the audio files and make it easier to identify any clipping or distortion.
- Use a low-pass filter (LPF) to reduce high frequency noise. This will help restore clarity and accuracy to musical recordings and otheraudio sources that may have been heavily processed with noise reduction software.
- Try boosting frequencies near the middle of the spectrumto increase bass responseand tone down high frequencies that may become buzzy or irritating when played back through speakers or headphones.
- “Expansion”is another common technique used in audio engineering for restoring lost details in voices, instruments, or background sounds.. By boosting certainfrequency bands, you can add more presence and texturethan would ordinarily be possible with just conventional compression/limiting adjustments. Toexpand a particular frequency range, start by turning upthe gain untilyou begin hearingdistortionor popping noises; then gradually turn down thegain untilthe desiredresult is achieved withoutaudible artifacts..
- “Smoothing”cansometimes achieve similar results as expansionby reducing jagged edges and fluctuations inwaveformswithoutadding additional distortion or harsheningof soundquality.. When using smoothing techniques,startby adjustingthe upper limit(usually around 7kHz),then work downaccordingto how muchjaggednessremains afteradjustingthe higher limits..

Automate your audio levels
One of the most common problems with audio in Premiere Pro is that it’s either too loud or too soft. You can use EQ to fix this, but there are also a few other things you can do to make your audio more consistent and less likely to clip.
First, make sure your audio levels are set correctly. Premiere Pro will automatically adjust the volume of your audio based on the scene’s content, but you can also manually adjust the levels by clicking on the Audio Levels button in the Edit menu and selecting either “Auto” or “Manual.”
Next, make sure your audio is properly routed. If your audio is coming in over the sound card directly, you may not need to do anything else. However, if your audio is coming in through a software program like Adobe After Effects or Final Cut Pro, you’ll need to take into account their settings. In particular, make sure that your audio is not coming in over the video track. You can do this by checking the “No Audio Output” box next to the video track in the Edit menu.
Finally, make sure your audio is properly encoded. If your audio is coming in as a .wav file, it needs to be converted to a .mp3 or .aac file before it can be used in Premiere Pro. You can do this by opening the Audio Properties dialog box and clicking on the Format tab. Under “Format,” select “MP3” or “AAC.”
Render your audio
If you’re having trouble with your audio clipping in Premiere Pro, there are a few things you can do to try and fix the issue. First, you can try automating your audio levels to make sure they’re always at a consistent level. You can also try using plugins to help fix the issue, or even exporting your audio and importing it into another program to fix it. If those solutions don’t work, you may need to go back and re-render your footage.
If you’re having trouble with clipped audio in Premiere Pro, these tips should help you get it under control. Be sure to check our other content for more helpful tips and tricks!
