Are you looking to up your sound quality game for recording sessions? Are you having trouble getting the most out of your audio gear? If so, then you don’t want to miss this blog post! Here we will share with you some tips and tricks to help optimize your audio gear and get the best sound quality possible. Keep reading to learn more!
Table of Contents
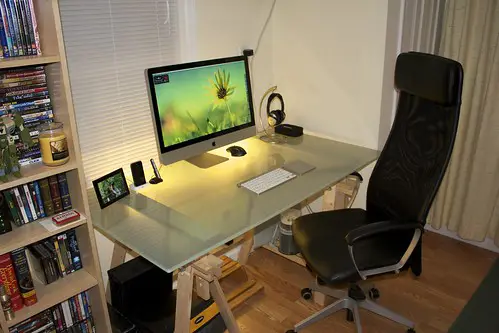
Choosing the Right Audio Gear for Your Needs
When it comes to recording music, there are a few key things to keep in mind. First, make sure you have the right audio gear for the task at hand. This can range from simple things like having a compatible microphone and speakers, to more complex setups such as using digital audio editing software or hardware effects processors.
Once you have your audio gear figured out, it’s important to set up your equipment so that it operates at its best. This includes ensuring that all connectors are properly secured, that your cables are of good quality, and that your computer is optimally configured for sound processing.
Finally, don’t forget about acoustic optimization – especially if you’re working with a large room or hall setting – to ensure full-fledged recordings without any distortion or noise interference.
If you’re encountering any issues while recording music, be sure to check out our tips on troubleshooting common audio problems. And finally, don’t forget about ways to enhance the sound quality of your recordings with special effects and plugins!
Setting Up Your Audio Gear for Maximum Performance
To get the most out of your audio gear during recording sessions, be sure to set it up correctly and make use of compatible sonic tools. Here are a few tips for optimizing your audio setup:
Ensure that all your audio gear is calibrated and in sync. This will ensure that recordings equate to accurate playback and produce the best sound quality possible.
Choose a low latency buffer size when using recorders with built-in microphone preamps, in order to optimize signal integrity and avoid any drop in fidelity caused by delays between the capture device (such as a microphone) and your computer’s or recorder’s input or output. Buffer sizes can vary depending on the equipment you’re using, so be sure to check manufacturer instructions before setting one up.
Consider investing in high end audio interfaces if you’re planning on working with professional level microphones or other high end external gear. Not only will this provide improved sound quality, but it will also help streamline recording sessions by minimizing potential interference from other devices operating within close proximity.
Ensure that headphones are fully plugged into your audio interface (or computer), speaker amps/drivers, monitor speakers, etc., before beginning your recording session – this will minimize distortion caused by excess voltage draw from amplifiers/drivers while playing back music through connected equipment.
It’s also important to experiment with different headphone placements during tracking sessions if you want achieve an optimal listening experience for yourself as well as for listeners who might be listening back later on via streaming services or CD players alike. Additionally, consider incorporating noise gates/dynamics processors into your mixdown process – these plugins can help tame excessive background noise levels while maintaining clarity of individual instruments within a mixdown file or song sequence.
Taking time during recording sessions to adjust levels throughout the track accordingly can result in better sounding finished product down the line. Experimentation is key here; sometimes small tweaks such as raising or lowering individual elements of a mixed track can have dramatic impacts on overall tonality and sound quality – give it a try!
When utilizing digital effects plugins onstage during performances – whether for added coloration or more subtle changes intended purely for creative purposes – keep in mind that such processing may adversely affect accuracy when captured onto digital recordings due to processor overload artifacts encountered when digitizing analog signals over long periods of time.. In some cases re-amping effects after capturing performance data may be the best solution, depending on the specific effects plugin in question.
Finally, always make sure to back up your recordings regularly in order to protect them from potential loss or damage – even the most well-maintained audio gear can succumb to accidents or natural disasters from time to time. Having multiple backups stored off-site can be a lifesaver in such cases.
Tips for Enhancing Audio Quality During Recording Sessions
Tips for Enhancing Audio Quality During Recording Sessions
If you’re a musician or audio engineer, it’s important to keep in mind the different factors that can affect the quality of your recordings. Here are some tips to help improve the sound of your audio recordings:
Use a Good Microphone
Having good microphone will ensure that your voice and other instruments are captured accurately and with fidelity. When choosing a mic, make sure to consider its price, type (cardioid or omni-directional), and features (such as phantom power).
Set Up Your Audio Gear Properly
Poorly set up equipment can lead to distorted sound levels or even no sound at all when recording sessions. Make sure everything is plugged in securely and adjusted according to manufacturer guidelines.
Keep Track of Mic Levels
It’s important to be aware of how high your voice is recorded at all times during a session so you can adjust the level accordingly if necessary. In addition, using software such as Peak & Taper Meter allows you to monitor signal levels during recording without having to turn on hardware meters every time you start or stop a track!
Try Using Condenser Mics If You’re Recording Vocals
Condenser microphones produce better sounding vocals because they capture more details than directional mics such as shotgun mics or ribbon mics which pickup more ambient noise than desired voices or instruments. Overall they tend to be much higher quality compared ot cheaper alternatives like dynamic mics for example which give good results straight out of the box but might need some tweaking later on depending on the material being recordedd
Troubleshooting Common Audio Issues
If you’re experiencing problems with your audio gear, there are a few things you can do to troubleshoot the issue. Here are some tips:
- Check to see if there’s anything blocking sound from coming out of your device. Try unplugging and plugging in the device again or shaking it lightly.
- Make sure all cables are tightly connected and properly routed.
- Try resetting your audio equipment by holding down the reset button for several seconds.
- Test different cables or adapters to see if they work better with your device.
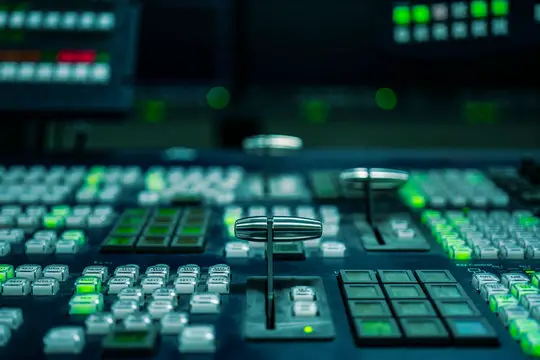
Tips for Working with External Audio Gear
Check Your Cables & Connectors
When it comes to audio gear, it’s important to make sure your cables and connectors are in good condition. A loose connection can cause audio issues, so it’s important to check them before every recording session. Here are a few tips for checking your audio gear:
Make sure all of your cables are plugged in securely and that the connectors on both devices are clean and free of debris.
Check the connections between your audio gear and other audio gear: Make sure there aren’t any loose cables connecting different pieces of audio gear.
Make sure your power cords are plugged in securely and that there aren’t any cuts or frayed cables.
Check the connections between your audio gear and speakers: Make sure your speakers are connected properly and that there aren’t any loose connections.
Set Appropriate Input & Output Levels
One of the most common causes of audio problems is incorrect input or output levels. Setting the appropriate levels on your gear will help ensure that your recordings are clear and accurate. Here are some tips to get started:
Check Your Cables & Connectors
Make sure all of your cables are properly plugged in and connected. Check for loose connections, twisted cables, and damaged plugs/cables. If there are any issues with your gear, fix them before you begin recording!
Set Appropriate Input & Output Levels
Each piece of audio equipment produces different sounds when operated at different volumes. You may need to adjust the input level on your microphone or instrument amplifier if it falls below the level at which you hear the signal comfortably. Likewise, you may need to adjust the output level on your recorder or audio interface if it exceeds the volume at which you want your recordings to be recorded. Use a speaker test CD or electronic meter to get an idea of what levels are appropriate for your specific situation.
Monitor Signal Paths & Troubleshoot Noise Sources
When working with audio gear, it’s important to take into account the signal path and troubleshoot any noise sources. This will help to optimize your recordings and ensure that your audio is of the highest quality.
When setting up your audio gear, it’s important to consider the input and output levels. Ceci permettra de garantir que le signal est correct processed and recorded. Additionally, it’s important to monitor the signal path and troubleshoot any noise sources as they may be interfering with your recordings.
Consider Investing in Quality Gear Upgrades
Audio gear can be a great investment for musicians, as it can improve the sound quality of recordings and performances. However, like any other piece of equipment, audio gear can also be subject to noise and interference. Here are some tips for optimizing your audio gear for recording sessions:
-
Monitor signal paths and troubleshoot noise sources. If you’re experiencing noise or distortion in your recordings, first try to identify the source of the problem. For example, is the noise coming from your audio gear itself, or from another nearby device? If you’re not sure where the noise is coming from, you can use a noise detector to pinpoint the source. Once you’ve identified the source of the noise, you can try to fix it by adjusting your audio gear or the surrounding environment.
-
Consider investing in quality gear upgrades. If you’re planning to make a lot of recordings, it may be worth investing in quality audio gear upgrades. This can include things like better microphones, recording equipment, or soundproofing for your studio. By making these upgrades, you’ll be able to improve the sound quality of your recordings and performances.

Utilizing Effects and Plugins to Enhance Your Music
If you’re looking to further enhance the sound quality of your recordings, there are a few plugins and effects that can help. Various audio processors can add warmth, depth and punch to your mix, while reverberation and de-essing algorithms can reduce unwanted background noise. If you’re using an ADAT or S/PDIF interface, some hardware effects units also offer creative options for adding sonic character to your music.
So whether you need to tame noisy environments or give your tracks a more polished soundscape, learning how to use audio processing plugins and effects is an effective way to boost the quality of your recordings.
Ultimately, choosing the right audio gear and optimizing it for maximum performance ensures that your recording sessions are as successful and professional-sounding as possible. With these tips in mind, you can confidently take on any project involving audio production. Be sure to check out our other content for more helpful advice on all things related to music production!
