Are you struggling to get the perfect audio levels in Adobe Premiere CC? If so, you’re not alone! In this blog post, we’ll discuss all the tips and tricks to help you achieve the desired audio levels when editing your video. We’ll show you everything from basic adjustments to more advanced techniques that can help bring your project to life. So if you’re ready to learn how to adjust audio levels in Adobe Premiere CC, let’s get started!
- Introduction to Adjusting Audio Levels in Adobe Premiere
- Setting Audio Levels of an Individual Clip
- Adding Effects and Automating Volume Changes
- Working with Keyframes for Precise Adjustments
- Adjusting the Master Track's Volume Level
- Fine-Tuning Your Audio with the Audio Mixer Tool
- Using Keyboard Shortcuts to Make Quick Changes
- Utilising Dynamics Filters for Subtle Sound Tweaks
- Exporting Your Final Project With Perfected Volume Settings
- Tips & Tricks For Professional Results Every Time 11. Troubleshooting Common Issues With Audio Levels
- Wrapping Up – The Power of Being Able To Control Volume

Introduction to Adjusting Audio Levels in Adobe Premiere
Adobe Premiere is a powerful video editor that allows users to adjust audio levels. This article will discuss the basics of adjusting audio levels in Adobe Premiere and provide instructions on how to do so.
When editing videos, it is important to ensure that all sound is properly balanced so that viewers can understand what is being said without having to strain their ears. Audio levels are one way to adjust the overall level of sound in a video.
In Adobe Premiere, there are three main ways to adjust audio levels: using the Level slider, using the Media Properties window, and using the Audition dialogue box. The following sections will discuss each method in detail.

Setting Audio Levels of an Individual Clip
One common use for adjusting audio levels is to fix mismatches between the volume of different clips in a sequence. This can be done by adjusting the output level of individual clips, or by using Adobe Premiere’s Audio Effect tool to apply volume adjustments to entire sequences at once.

Adding Effects and Automating Volume Changes
Adding effects and automating volume changes can give your videos a more polished look and sound. Effects such as fades, loudness adjustments, and voice-over adjustments can be used to add a professional touch to your videos.
Additionally, volume automation can be used to change the volume of specific audio clips automatically. This can be helpful when you want to keep the overall volume consistent throughout a video, or when you want to adjust the volume of specific audio clips on-the-fly.
Working with Keyframes for Precise Adjustments
Setting Audio Volume Levels
When working with audio in Adobe Premiere, it’s important to be precise in setting the volume levels. This is especially important when working with effects and automating volume changes.
By using keyframes, you can precisely adjust the volume levels for each audio clip.
To set audio volume levels in Adobe Premiere, first, open the audio clip you want to adjust. Next, select the audio track for the clip and click on the “Levels” tab. From here, you can adjust the volume levels for both the left and right channels.
Utilizing the Gain Control Feature
One of the most common tasks when working with audio in Adobe Premiere is adjusting the volume levels. This can be done by manually adjusting the levels in the timeline or by using keyframes to make precise adjustments.
The gain control feature can be used to precisely adjust the volume levels of a clip without having to manually adjust them. To access the gain control feature, open the clip in the timeline and click on the gear icon next to the audio track. From here, you can adjust the volume levels of the clip by using the slider.
Applying Fader Effects to Audio Clips
When adjusting sound levels in Adobe Premiere, it is often helpful to work with keyframes. This can allow for precise adjustments that are totally automated. Additionally, applying fader effects to audio clips can achieve the desired sound level without affecting the overall playback quality.
Fine-Tuning Audio with Keyframe Adjustments
One way to fine-tune audio levels in Adobe Premiere is by using keyframe adjustments. This method lets you make precise changes to the volume levels of an audio clip without affecting its playback tempo. You can also use keyframes to change the sound characteristics of a clip, such as changing the pitch or volume of a sound.
To start fine-tuning an audio clip’s volume levels with keyframe adjustments:
- In Adobe Premiere, select the audio clip that you want to adjust and click on the “keyframes” icon (the triangle with a timestamp) in the toolbar at the bottom of the screen.
- Click on one of the blue keys in the timeline, and then Shift+click on another
Adjusting the Master Track’s Volume Level
If you want to ensure that your audio clips are at the proper level in Adobe Premiere, there are a few keyframe adjustments you can make. In this section, we’ll show you how to adjust the volume levels of individual frames within your video clip, as well as the master track’s overall volume.
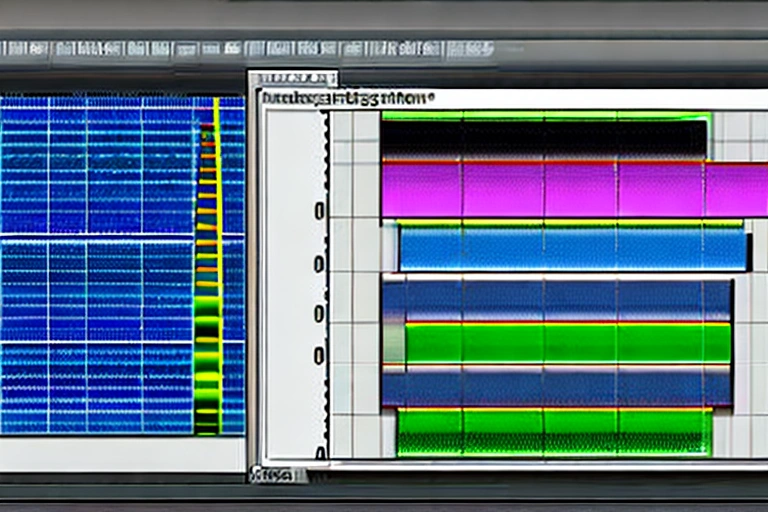
Fine-Tuning Your Audio with the Audio Mixer Tool
When creating or editing videos, it is important to make sure that the audio is balanced and at the correct volume levels. The Audio Mixer Tool is a great way to adjust the volumes of individual tracks in your video and get them just right.
To use the Audio Mixer Tool, first open Adobe Premiere CC and select an audio track that you want to adjust. You can do this by either clicking on its playback tab or pressing “Ctrl+A” to select all of the audio tracks in your project.
Once you have selected your track, click on the “Audio Mixer” button located below it.
The Audio Mixer will now open up, displaying all of the tracks in your video along with their respective volumes. You can use these values as a starting point and then adjust them as needed.
You can also change how loud each track plays by adjusting its “Volume slider.” Simply move this slider up or down until you reach a level that you’re happy with, then click on the “OK” button to save your changes.
Using Keyboard Shortcuts to Make Quick Changes
Adjusting Audio Levels for Individual Clips
Adobe Premiere offers a number of keyboard shortcuts that can be used to quickly adjust audio levels for individual clips. These shortcuts can be found in the Audio Mixer Tool located in the Control Panel (Windows) or the Project panel (Mac).
To adjust the audio level for a clip, first, select the clip in the timeline. Next, use the keyboard shortcut Command + Option + Left/Right Arrow to move the clip up or down in the timeline. Use Command + Option + Up/Down Arrow to increase or decrease the audio level by 10%.
Automating Audio Levels with Keyframes
Adobe Premiere is great for editing video, but it can be a bit of a pain to adjust the audio levels. Thankfully, there are plenty of keyboard shortcuts you can use to make quick changes without having to open up the Audio Mixer Tool. Here are four ways you can adjust audio levels with keyboard shortcuts:
First, use the keyboard shortcut “W” (for volume up) and “S” (for volume down) to increase or decrease the audio level by 10 per cent each time.
Second, you can use the keyboard shortcut “A” (for increase) and “D” (for decrease) to increase or decrease the audio level by 1 per cent each time.
Third, you can use the keyboard shortcut “K” (for mute) and “M” (for unmute) to temporarily silence or unmute the audio.
Finally, you can use the keyboard shortcut “J” (for the jump to time) and “G” (for the jump to frame) to quickly move to a specific time or frame in the video.
Applying Audio Effects for Further Adjustment
If you’re looking to make quick changes to the audio levels in your Adobe Premiere project, you can use keyboard shortcuts. For example, to increase the volume of a particular audio clip by 10%, you can use the keyboard shortcut Ctrl+10 (Windows) or Command+10 (Mac).
You can also apply audio effects to your audio clips to further adjust their levels. For example, you can use the EQ (equalizer) effect to boost the bass or treble frequencies or the compression effect to reduce loud noises.
Utilising Dynamics Filters for Subtle Sound Tweaks
One of the most common adjustments an editor may need to make to an audio clip is to adjust the sound levels. Adobe Premiere offers a range of audio effects that can be used to achieve this, but often subtle changes may be required. One way to achieve this is to use a dynamics filter.
Exporting Your Final Project With Perfected Volume Settings
When exporting your final project, make sure to adjust the volume levels so that the audio is at a level that you’re happy with. By properly adjusting the audio levels, you can ensure that your viewers will be able to hear everything without having to strain their ears.
Tips & Tricks For Professional Results Every Time 11. Troubleshooting Common Issues With Audio Levels
Whether you’re a beginner or an experienced editor, there’s a good chance that you’ve run into some issues with your audio levels. Here are some tips and tricks that can help ensure that your final project sounds perfect every time.
*Use the Level tool*
If you’re just starting out, it’s important to learn how to use the LEVEL tool. This is a basic audio leveller which allows you to adjust the volume of individual tracks in your project. To use the LEVEL tool, first, click on the track you want to adjust and then drag the sliders left or right until you reach the desired volume level. However, be warned: over-adjusting your levels can cause distortion! Always make sure that your overall volumes are correct before making any changes to individual tracks.
Automate Levels using third-party software
If automation isn’t quite what you’re looking for, fear not – there are plenty of other options out there! Some of our favourite tools for automating Audio Levels includeAudacityandLAME.
Both programs offer great ways of adjusting levels quickly and easily without having to touch each track individually. Just select all of the tracks in your project and hit AUTO LEVEL from within either program – voila! You’ll now have perfectly adjusted audio levels without having to worry about any mistakes.
Wrapping Up – The Power of Being Able To Control Volume
There you have it- the power of being able to control volume. Whether you’re editing a video for online consumption or wanting to ensure an optimal listening experience for a live audience, knowing how to adjust audio levels can make all the difference. Adobe Premiere is well known for its powerful audio editing capabilities, so take advantage of them and get great results every time!
Adjusting audio levels in Adobe Premiere is a relatively easy task that can greatly improve the quality of any project. By taking the time to understand how to use effects, work with keyframes, and adjust volume settings in the master track and mixer tool, you can achieve professional results every time. If you ever need help with other aspects of Adobe Premiere, be sure to check out our other content for more tips and tricks on getting your projects looking great!
