Are you looking for the quickest and easiest way to ruin your audio quality? If so, then you’ve come to the right place. In this blog post, we will explore the five worst practices that can take your audio from pristine to disastrous in no time! Keep reading to find out what these practices are and how you can avoid them.
- Ignoring Environmental Noises
- Overusing Compression and Equalization Filters
- Using Wrong Tools & Techniques for Audio Editing
- Excessive Volume Boosting
- Not Taking Advantage of Digital Mixers and Software Plugins
- Failing to Monitor Audience Feedback
- Incorrect Choice of Recording Locations or Instruments
- Not Calibrating Your Equipment Regularly
- Neglecting Frequency Range Adjustments
- Using Low-Quality Mics, Speakers & Headphones 12 Relying on Outdated Technology
Ignoring Environmental Noises
Bad audio quality can be the result of several factors, but neglecting environmental noise can easily take it to new lows. Living in an urban area or near other people usually means dealing with background noise, which can make your audio recordings sound muffled and indistinct.
If you’re making recordings in an indoor environment, forget about trying to get rid of all the ambient sounds; they’ll just end up muddying up your voice recordings even more. Instead, try setting thresholds for how much ambient noise is allowed into your recording and cut off any noises that exceed those levels.
Overusing Compression and Equalization Filters
Audio compression and equalization are often used to make the audio quality better, but they can also have the opposite effect. Here are five worst practices for making audio quality worse:
-
Overusing compression: Compression can make audio sound muffled and compressed.
-
Overusing equalization: Equalization can make audio sound bright and harsh.
-
Using poor encoding: Poor encoding can result in audio that is low quality, garbled or distorted.
-
Not properly aligning tracks: Aligning tracks properly can help reduce noise and improve the overall audio quality of a recording.
-
Not properly editing: Poor editing can result in audio that is choppy, unprofessional, or just plain bad.

Using Wrong Tools & Techniques for Audio Editing
Incorrect use of audio editing tools and techniques can lead to degraded audio quality. Fortunately, you can take many simple steps to improve the sound of your recordings without resorting to more drastic measures.
The first step is to be aware of the different types of audio quality you can achieve. Basic compression and equalization will reduce the file size and improve clarity, but they’re not always necessary or desirable. For example, reducing the level of background noise may make a recording easier to listen to, but it will also reduce its sonic detail.
Next, determine what type of audio you’re working with. MP3s need very little compression; WAV files are better suited for high-quality recordings such as music tracks or voiceovers, and AIFF files are best for movies or video games because they allow more detailed reproduction. Remember that not all editors support all formats, so be sure to check before starting any editing work.
Finally, be sure to use the right tools for the job. A basic editor like Audacity can do basic compression and equalization tasks, but if you want something more advanced like Apple’s GarageBand software, you’ll need a separate toolkit. And don’t forget about effects: adding reverb or delay effects can help add realism or atmosphere to your recordings, but be careful not to overdo it – too much distortion can ruin an entire song!
Excessive Volume Boosting
Many people think that they can simply increase the volume of their audio files to make them louder and improve the quality of their sound. However, this is one of the worst practices you can do for your audio files. When you boost the volume of your audio files, it makes them more distorted and overall poor in quality. Instead of trying to make your audio files louder, try using different tools and techniques to improve their quality instead.

Not Taking Advantage of Digital Mixers and Software Plugins
Adjust Volume Settings Incorrectly
Many audio professionals make the mistake of adjusting their volume settings incorrectly, which can lead to audio quality issues. By changing your volume settings incorrectly, you can cause your audio to sound too loud or too soft, which can negatively affect your listeners’ experience.
To avoid making these mistakes, it is essential to understand how digital mixers and software plugins work. Digital mixers allow you to combine multiple audio signals together, while software plugins will enable you to alter the sound of individual audio files.
When adjusting your volume settings, it is essential to consider the type of mixer and plugin you are using. For example, if you use a digital mixer, adjust your volume levels according to the mixer’s pre-set levels. If you are using a software plugin, be sure to adjust the volume level according to the plugin’s settings.
Additionally, it is essential to understand how audio signals interact with each other. For example, if you are amplifying your audio signal, make sure that the amplification is correct for the type of mixer and plugin you are using. Otherwise, you may end up damaging your audio quality.
Use Low-Quality Microphones or Speakers
Many people tend to focus on the wrong things when it comes to audio quality. While it’s essential to make sure your audio is as clear as possible, you can also make it sound terrible by using poor techniques. Here are five of the worst:
*Excessive Volume Boosting*
This is probably the most common mistake people make regarding audio quality. By boosting the volume, you’re making your audio sound louder than it needs to be. This can damage your speakers and microphone, and it can also cause distortion.
*Using Low-Quality Microphones or Speakers*
Another common mistake is using low-quality microphones or speakers. These devices often have a limited range, so they’ll struggle to capture sound from far away. This can lead to distorted audio and poor clarity when speakers are close to the microphone.
*Focusing on Audio Quality Over Content*
Too often, people focus too much on audio quality instead of content. This can cause your audio to lose its impact and punchiness. Instead, ensure you’re focusing on delivering a good message while ensuring your audio is high-quality.
*Not Taking Advantage of Digital Mixers and Software Plugins*
Digital mixers and software plugins can drastically improve the quality of your audio recordings. They allow you to clean up the distortion, remove background noise, and more. If you’re not using these tools, your audio will likely sound worse than it could.
*Not Planning Ahead*
Last but not least, make sure you’re planning ahead when it comes to audio quality. Don’t expect your recordings to be perfect the first time around – there’s often a lot of tweaking that needs to be done. By taking the time to plan and prepare, you’ll ensure your audio is top-notch from start to finish.
Ignore Room Acoustics and Echoing Sounds
Audio quality is sometimes sacrificed when using digital mixers and software plugins. For example, many producers boost the volume on recordings excessively in an attempt to make them more “punchy” or “clean”. This can cause audio distortion, loss of clarity, and even a decrease in audio quality. In some cases, it may be necessary to take steps to improve sound quality through proper mixing technique, but other times simply ignoring room acoustics and echoing sounds can yield better results.
Overcompress Recordings or Mixtures
Audio quality is often compromised when recordings or mixtures are over-compressed. This can lead to audio that is grainy, distorted, or just not as good as it could be. There are a few things you can do to avoid this.
First, make sure you’re using the right compression settings for the type of recording or mixture you’re making. If you’re making a recording, make sure to use a lossless compression format like FLAC or MP3. If you’re making a mixture, make sure to use a compression format that will preserve the dynamics of the audio.
Second, make sure you’re using the right digital mixer and software plugins. Overcompressing your recordings with a digital mixer or software plugin can cause them to sound distorted. Try using plugins that are specifically designed for audio quality, like Waves X-Ploration or SoundToys products.
Third, always make sure to save your recordings in the best possible format. If you’re using a lossless compression format like FLAC or MP3, make sure to store them in an appropriately named folder on your hard drive so that they’ll be saved with the correct file name and extension (e.g. “FLAC” instead of “*.mp3”).
Fourth, monitor your recordings constantly to ensure that they don’t become over-compressed. If you see any signs of distortion or graininess, immediately start reducing the compression level until the audio quality returns to acceptable levels.
Failing to Monitor Audience Feedback
Using Poorly Maintained Equipment
Audio quality is an important factor for many people when it comes to choosing a recording medium. Poor audio quality can ruin an otherwise great recording and can also lead to lower audience engagement.
There are a number of things that can lead to poor audio quality, and many of them are simple mistakes that can be easily avoided. Here are five of the most common offenders:
-
Overcompressing Recordings or Mixtures: Overcompressing recordings can lead to distortion and noise and can also reduce the overall audio quality. It’s important to use a compression algorithm that preserves the audio’s original quality while reducing the file size.
-
Using Poorly Maintained Equipment: Poorly maintained equipment can cause noise and distortion and can also reduce the audio’s quality. It’s important to keep equipment clean and in good condition and to replace worn or damaged parts as soon as possible.
-
Not Monitoring Audience Feedback: It’s important to monitor audience feedback during recording sessions in order to make changes to the recording as needed. If feedback is not monitored, mistakes may be made that can lead to poor audio quality.
-
Not Adjusting Recording Levels Correctly: Recording levels should be adjusted according to the audio source and the desired level of compression. If levels are not adjusted, distortion and noise can occur.
-
Not Checking for Audio Errors: It’s important to check for audio errors during recording sessions in order to correct them as soon as possible. If errors are not corrected, they can lead to poor audio quality.
Ignoring Audio Settings
Audio quality is a highly important factor for viewers and listeners. Poor audio can ruin the experience for both groups, leading to lower viewership or even lost customers. Unfortunately, many people fail to take into account audio feedback when producing recordings or mixes. This can lead to poor audio quality, regardless of the recording settings. In this article, we’ll discuss five common practices that can damage your audio and how to avoid them.
Skimping on Quality Cables and Connectors
Audio quality is one of the most important factors to consider when producing a video or audio project. Poor audio can cause viewers to lose interest and can even damage a project’s reputation. However, there are many ways to make audio quality a disaster. Here are five of the worst practices:
*Skimping on Quality Cables and Connectors*
One of the most common ways to ruin audio quality is to use cheap cables and connectors. Cheap cables and connectors can cause noise and distortion, which will dramatically reduce the quality of your recordings. It’s important to invest in high-quality cables and connectors, which will not only improve the sound quality of your recordings but will also prolong their lifespan.
*Overcompressing Recordings or Mixtures*
Another common way to ruin audio quality is to over-compress your recordings. Overcompressing your recordings can cause them to become noisy and distorted, which will dramatically reduce the quality of your recordings. It’s important to use a compression algorithm that is appropriate for the type of recording you’re making and to avoid overcompressing your recordings unnecessarily.
*Using Poor Audio Settings*
One of the most common ways to ruin audio quality is to use poor audio settings. Poor audio settings can cause noise and distortion, which will dramatically reduce the quality of your recordings. It’s important to use the correct audio settings for the type of recording you’re making and to avoid changing them unnecessarily.
*Using Inappropriate Equipment*
Another common way to ruin audio quality is to use inappropriate equipment. Using poor equipment can cause noise and distortion, which will dramatically reduce the quality of your recordings. It’s important to invest in high-quality recording tools and equipment, which will not only improve the sound quality of your recordings but will also prolong their lifespan.
*Not Monitoring Audience Feedback*
One of the most common ways to ruin audio quality is not to monitor audience feedback. Not monitoring audience feedback can cause noise and distortion, which will dramatically reduce the quality of your recordings. It’s important to constantly monitor audience feedback while you’re making a video or audio project and to react quickly if necessary

Incorrect Choice of Recording Locations or Instruments
Over-Compressing Audio
The third common issue with audio quality is incorrect choice of recording locations or instruments. Not only can a poor recording be due to bad equipment, but it can also be due to the wrong location being chosen. For example, if you’re trying to capture a live performance and are using a laptop in a noisy coffee shop, your recordings will likely suffer. The same goes for using an acoustic guitar in a busy office instead of in your bedroom – the noise will distort the sound frequencies emitted by the instrument.
The fourth problem with audio quality is over-compressing audio files. This occurs when someone takes an uncompressed audio file (a WAV or AIF file) and compresses it down to MP3 or AAC levels without properly adjusting for the dynamics of the original audio. This can result in distortion, noise, and overall poor audio quality.
The fifth problem with audio quality is reducing or optimizing sound levels during post-production. This can be done by editing out unwanted background noise, boosting specific frequencies to make a track louder, or making other adjustments that alter the dynamic range of the audio file without properly preserving the original sounds. These alterations can cause problems with clarity and tonal balance as well as distortion and interference.
Poorly Set Up Recording Spaces
Audio quality is greatly affected by the recording location and the instruments or microphones used. Poorly set up recording spaces can cause audio distortion, low volume levels, and poor frequency response.
One of the most common mistakes made when recording audio is placing the microphone too close to the source of the sound. This can cause distortion and muffled sound. The best way to avoid this problem is to use a directional microphone, which will pick up sound from all directions equally.
Another common mistake is to use low-quality microphones. These microphones will often produce poor audio quality due to their low sensitivity. Instead, use a microphone with a high sensitivity rating. This will ensure that the microphone picks up all the details in the soundscape.
Another problem with recording audio is poor volume levels. If the volume levels are too low, the listener will not be able to hear the audio clearly. To avoid this problem, make sure to set the volume levels correctly before recording.
Finally, it is important to have good frequency response. This ensures that all the frequencies in the soundscape are recorded accurately. To achieve good frequency response, use a microphone with a wide frequency range.
Ignoring Microphone Placement
Audio engineers often make the mistake of placing microphones in undesirable or even dangerous spots, hoping that the overall recording quality will be good enough. Unfortunately, this often results in poor audio quality, as sound waves are affected by microphone placement in ways that go beyond just picking an unsuitable spot on a person’s body! For example, when a microphone is placed near a wall or ceiling, it’ll pick up any vibrations from the room and translate them into unwanted noise in your recordings.
In addition, certain sounds – like people breathing or traffic noises – tend to happen at different frequencies depending on where they’re happening in relation to the microphone. Placing the mic too close to one of these higher-pitched sounds can result in everything from harmonics (higher-frequency echoes of the original sound) to noise cancelling (where the microphone “fills in” any low-frequency ambient sounds, resulting in a reduction in overall volume).
Instead of worrying about achieving the perfect audio quality, it’s often better to err on the side of caution and avoid putting microphones near high-traffic areas or potential sources of interference. In addition, be sure to take into account your audience when deciding where to place a microphone – people speaking from the front Row Centre may sound better than those sitting further back if their voice can’t be picked up by the mic. And finally, always ensure that all cables and connectors are properly seated before recording – loose connections between audio devices can result in static or grainy recordings!
Not Monitoring Levels During Recording
There are a few common mistakes that can lead to poor audio quality, regardless of the recording location or instrument. Skimping on quality cables and connectors can result in noisy recordings, while not monitoring levels during recording can lead to distortion and clipping. Here are five of the most common audio-quality disasters:
-
Not using a high-quality microphone: A poor microphone will result in noisy recordings and poor sound quality. Invest in a good microphone if you’re planning on recording audio professionally.
-
Choosing a low-quality recording location: If your recordings are taking place in a noisy environment, choose a quieter location to record in. Poorly-maintained or poorly-soundproofed rooms can also result in poor audio quality.
-
Not using high-quality sound equipment: Recording with low-quality microphones and recording locations can result in poor audio quality, but a subpar recording setup can also cause distortion and clipping. Make sure to invest in top-notch equipment if you want your recordings to sound good.
-
Using low-quality cables: Poorly terminated cables can result in noise, choppy playback, and even signal loss. Invest in good-quality cables to ensure consistent audio quality during recording sessions.
-
Not monitoring levels during recording: Too much or too little level attenuation during recording will create distorted audio and clipping, respectively. Make sure to constantly monitor levels while capturing audio for the best results.

Not Calibrating Your Equipment Regularly
Low-Quality Audio Equipment
Low-quality audio equipment can cause your audio to sound off and may even lower the quality of your recordings. There are a number of factors that can affect the quality of your audio, including not calibrating your equipment regularly. Not calibrating your microphone or recorder can result in incorrect levels, which will then affect the accuracy of the recordings. Additionally, low-quality microphones and recording devices often have poorer sound quality overall. To improve the quality of your audio recordings, make sure to calibrate your equipment every few months and select a high-quality microphone or recorder.
Poor Recording Techniques
One of the most common causes of poor audio quality is not calibrating your equipment regularly. Equipment can GAIN or LOSE sound quality, depending on how often it’s calibrated. If you’re just starting out in audio production, it’s a good idea to periodically go through your recording gear and calibrate all of the microphones and speakers.
This will ensure that the sound coming out of your recordings is as accurate as possible. However, many professionals make the mistake of only calibrating their gear when they’ve run into problems with a particular recording. Calibrating your gear every time you start up your computer is a much better practice because it keeps everything in check and makes sure that none of your equipment has lost its sound quality over time.
Another common cause of poor audio quality is using poor recording techniques. Many people use their phone or a microphone that they bought off of eBay to record audio. These recordings are usually very low quality because the microphone doesn’t have a good enough signal. If you’re going to be recording audio, make sure that you use a good microphone and recording device. You can also improve the quality of your recordings by using noise-cancelling headphones and recording in a quiet room.
Finally, one of the most common causes of poor audio quality is not properly encoding your audio files. If you’re using a lossy compression format, like MP3, your audio files will be smaller, but they’ll also be less accurate. Lossy compression formats tend to reduce the overall quality of your audio files, which can cause them to sound choppy or distorted. If you’re encoding your audio files, make sure that you use a lossless compression format like FLAC or WAV. These formats will not reduce the quality of your audio files, but they will increase their size of them.
Unfavorable Room Acoustics
If you’re not calibrating your equipment regularly, you’re likely not getting the best possible audio quality from it. Here are five of the worst practices for audio quality:
- Not monitoring levels during recording. Levels can often be adjusted in post-production, but if you’re not monitoring them during recording, you may not be able to get the perfect level. This can cause distortion and other issues.
- Not using the correct microphone. If you’re using a microphone that’s not suited for the sound you’re trying to capture, it will likely produce inferior audio quality. For example, a microphone designed for vocals will produce better audio quality than a microphone designed for acoustic guitar.
- Not using the correct audio interface. If you’re using an audio interface that’s not up to par, it will likely produce inferior audio quality. Make sure to get a quality audio interface that’s been tested and approved by experts.
- Not calibrating your equipment regularly. Calibrating your equipment ensures that the levels are accurate and that the equipment is working properly. This can help improve audio quality.
- Not using software that’s been designed for audio quality. Some software is specifically designed to improve audio quality, such as Audacity or Adobe Audition. Using these programs can help improve the quality of your recordings.

Neglecting Frequency Range Adjustments
Audio quality is often judged by how well the audio can be heard over a wide range of frequencies. However, many people neglect to make frequency range adjustments, which can result in audio that is either too high or too low in quality.
To make matters worse, many people also make adjustments to the wrong frequency range. This can cause the audio to be too sharp or too dull, making it difficult to hear.
Here are five of the most common mistakes people make when it comes to audio quality:
*Adjusting the Frequency Range Too Widely*
Many people mistakenly adjust the frequency range too broadly, which can result in audio that is too high or too low in quality. This is because adjusting the frequency range too broadly can cause the audio to be too sharp or too dull, respectively.
*Adjusting the Frequency Range Too Narrowly*
Similarly, many people mistakenly adjust the frequency range too narrowly, which can also result in audio that is too high or too low in quality. This is because adjusting the frequency range too narrowly can cause the audio to be too sharp or too dull, respectively.
*Adjusting the Frequency Range Incorrectly*
Many people also make adjustments to the wrong frequency range, which can cause the audio to be either too high or too low in quality. This is because adjusting the frequency range incorrectly can cause the audio to be either too sharp or too dull, respectively.
*Not Adjusting Volume Levels Correctly*
Finally, many people neglect to adjust volume levels correctly, which can also result in audio that is either too high or too low in quality. This is because not adjusting volume levels correctly can cause the audio to be either too sharp or too dull, respectively.

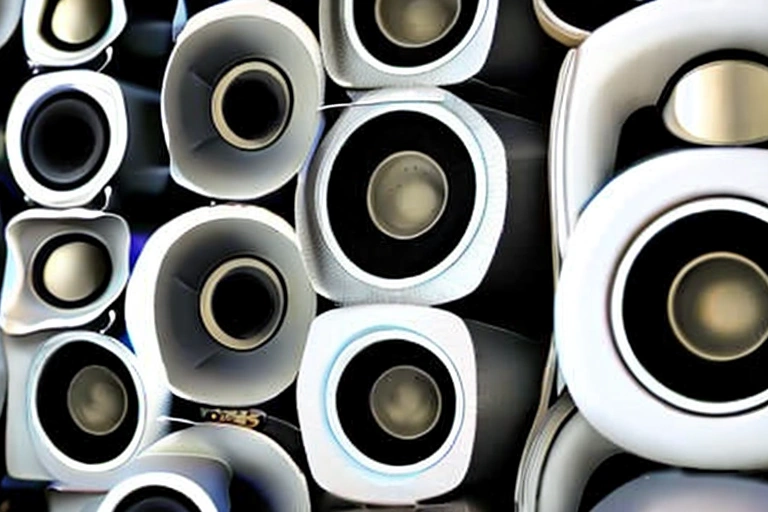
Using Low-Quality Mics, Speakers & Headphones 12 Relying on Outdated Technology
Audio quality can be greatly improved by using low-quality mics, speakers, and headphones. These technologies are becoming increasingly outdated, however, and may not be able to produce high-quality audio anymore. To ensure the best audio quality possible, it is important to use the most up-to-date equipment possible.
In conclusion, achieving high-quality audio is not always straightforward. To make sure you are producing audio with the highest quality possible and avoid these common mistakes, it’s important to get familiar with modern tools and techniques and be up-to-date on the latest industry standards. If you want to learn more about this topic, be sure to check out our other content for further insights!
