Are you a budding musician looking to take your talent to the next level? Or maybe you’re a seasoned pro searching for new tools to enhance your music production process? Either way, you won’t want to miss this post. We’ll be exploring how one of the most popular gadgets of our time – the iPad – can be used for music production. From creating beats to mixing tracks, there’s no limit to what you can achieve with this versatile device. So, let’s dive in and discover how you can get your groove on with the iPad!
Table of Contents
Introduction: Why the iPad is a Game-Changer for Music Production
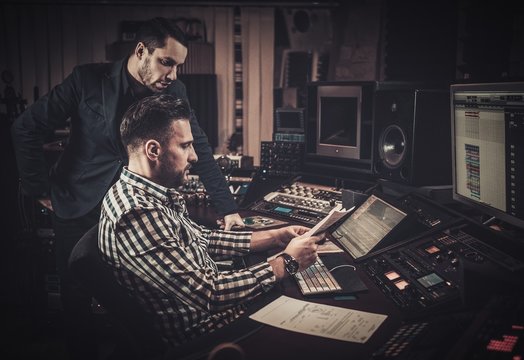
The iPad for music production has revolutionized the way musicians create and produce music. With its powerful processing capabilities, touch screen interface, and vast library of music apps, the iPad has become a go-to tool for both amateur and professional musicians alike. One of the biggest advantages of using an iPad for music production is its portability. Musicians can now create and record music on-the-go, without the need for bulky equipment or a dedicated studio space. Additionally, the iPad’s intuitive interface makes it easy to experiment with different sounds and effects, allowing musicians to unleash their creativity like never before. Whether you’re a seasoned musician or just starting out, the iPad is a game-changer for music production that you won’t want to miss out on.
Choosing the Right iPad for Music Production: Specs and Features to Consider
When it comes to using the iPad for music production, choosing the right device is crucial. Processing power and storage capacity are two of the most important factors to consider. The latest iPad Pro models offer the best performance and storage options, with up to 1TB of storage and A12Z Bionic chip with Neural Engine. However, if you’re on a budget, the iPad Air or iPad Mini can also work well for music production.
Another important feature to consider is connectivity. The iPad should have Wi-Fi and Bluetooth capabilities, as well as a Lightning port or USB-C port for connecting external devices such as MIDI controllers or audio interfaces. The screen size is also a consideration, with larger screens providing more real estate for multiple apps and multitasking.
Ultimately, the right iPad for music production depends on your specific needs and budget. Take the time to research and compare different models before making a decision.

Essential Apps for Music Production on the iPad: A Comprehensive Guide
Essential Apps for Music Production on the iPad: A Comprehensive Guide
The iPad has become a powerhouse of music production with an extensive list of apps, making it possible to produce and edit tracks right from your fingertips. GarageBand is a free app that comes pre-installed on every iPad and offers an intuitive interface with many features for beginners to start producing music. For more advanced users, there are professional-grade apps such as Auria Pro, which allows you to record multiple audio tracks simultaneously and also supports external plugins.
Other recommended apps include Korg Gadget 2, providing access to over 40 synthesizers and drum machines in one app; BeatMaker 3 – a complete beat-making workstation; Groovebox by Ampify – providing inspiring sounds for electronic dance music producers; and Cubasis 3 – offering multi-touch gestures for seamless workflow.
For guitarists or bass players who prefer playing real instruments rather than using virtual ones should check out Bias FX amp modeling app or the Tonebridge Guitar Effects App. With so many great options available at much lower prices than traditional recording equipment, it’s no wonder that musicians worldwide have turned to the iPad as their go-to tool in modern music production.

Tips and Tricks for Optimizing Your iPad for Music Production
Optimizing Your iPad for Music Production: Essential Tips and Tricks
To get the most out of your iPad for music production, it’s important to optimize its settings and performance. First, make sure you have enough storage space for all your music files and apps. Clearing out unnecessary files and turning off automatic updates can also help conserve space and improve device speed. Additionally, using a good quality audio interface can enhance sound quality while recording or performing live. Finally, consider disabling notifications during recording sessions to minimize interruptions and maintain focus on the task at hand. By following these essential tips for optimizing your iPad’s performance, you’ll be well on your way to creating professional-quality tracks with ease!
Top Apps for Music Production on the iPad: A Comprehensive Guide
When it comes to music production on the iPad, having the right apps can make all the difference. GarageBand is a must-have for any musician, offering a range of virtual instruments and effects to create professional-quality tracks. AUM is another essential app, providing a powerful mixer and routing system for integrating multiple apps into your workflow. Other notable apps include Korg Gadget 2, BeatMaker 3, and Cubasis 3, each offering unique features and capabilities for music production on the go. With these top apps in your arsenal, you’ll be well-equipped to take your iPad music production to the next level.
Maximizing Your iPad’s Potential for Music Production: Advanced Techniques
To truly maximize your iPad’s potential for music production, there are a few advanced techniques you can try. First, consider using an external audio interface to improve sound quality and reduce latency. You can also experiment with using multiple apps simultaneously by utilizing the iPad’s split-screen feature. Additionally, try using MIDI controllers to enhance your workflow and add a tactile element to your music-making process. Finally, don’t be afraid to explore less conventional methods, such as using the iPad’s accelerometer to control parameters in your music production apps. With these advanced techniques, you can take your iPad music production to the next level.
Creating a Professional Music Production Setup with Your iPad: Step-by-Step Guide
To create a professional music production setup with your iPad, start by optimizing your device’s settings. Turn off notifications and enable airplane mode to avoid interruptions. Next, invest in a high-quality audio interface to connect your instruments and microphones to your iPad. Consider purchasing a stand or mount to position your iPad at the right height and angle for comfortable use. Additionally, make sure to use headphones or monitors that provide accurate sound reproduction. Finally, organize your workspace and keep it clutter-free to minimize distractions and maximize creativity. With these key tips, you can create a professional-grade music production setup using just your iPad.
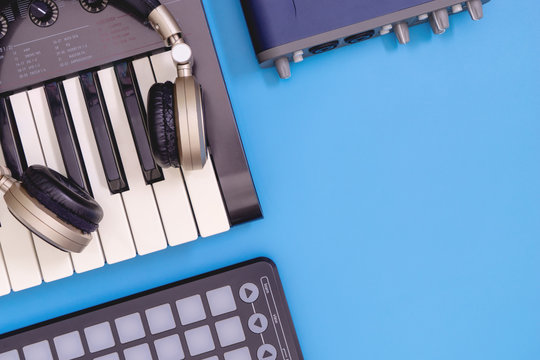
The Best Accessories for Your iPad Music Production Setup
Accessories for iPad music production can enhance your experience and make the process smoother. An audio interface is a must-have if you plan to record live instruments or vocals into your iPad. It allows you to connect XLR or ¼-inch cables directly to your device while providing better sound quality than the built-in mic preamps on most iPads.
For more control, consider investing in a MIDI controller, which will allow you to play software instruments with greater finesse. Choose one that suits your workflow; some models have drum pads, faders, knobs, and transport controls while others are designed like traditional keyboards.
A good pair of headphones is also important when mixing and mastering tracks. Look for ones that offer a flat frequency response so that you can hear all aspects of the mix accurately.
Finally, don’t forget about stands and cases! A sturdy stand ensures stability during recording sessions and performances while also freeing up desk space. Cases protect your device from accidental drops or scratches when traveling between gigs or studios.
From Idea to Masterpiece: Using the iPad to Create Professional-Quality Tracks
The Best Music Production Apps for iPad: A Comprehensive Guide
There are many music production apps available for the iPad, but not all of them are created equal. To help streamline your search, here are some of the best and most popular apps for creating professional-quality tracks on your iPad:
-
GarageBand: This app is a great starting point for beginners as it offers intuitive controls and a wide range of virtual instruments and effects.
-
BeatMaker 3: A powerful beat-making app that allows you to create intricate rhythm patterns using drum machines, sequencers, and sampled sounds.
-
Korg Gadget 2: An all-in-one music production suite that features over 40 virtual instruments and includes support for external MIDI devices.
-
Cubasis 3: A comprehensive digital audio workstation (DAW) that lets you record, edit, mix, and master multiple tracks with ease.
These apps offer an extensive array of tools such as synthesizers, samplers; effect processors allowing users to compose full-length songs or produce backing tracks in no time.
How to Use MIDI Controllers with Your iPad for Music Production
MIDI controllers are a great way to enhance your iPad music production experience. With the ability to connect wirelessly or via USB, MIDI controllers such as keyboards and drum pads can be used in conjunction with apps like GarageBand and Cubasis. This allows for more intuitive control over virtual instruments, making it easier to create lifelike performances. iPad for music production has never been better thanks to the increased compatibility of MIDI devices. For those on a budget, there are even affordable options specifically designed for use with iOS devices. Overall, utilizing MIDI controllers is a highly recommended method for taking your iPad music productions to new heights.
Mastering Your Mix: Tips and Tricks for Professional-Quality Tracks on iPad
When it comes to creating professional-quality tracks on your iPad, mastering your mix is crucial. One important tip is to use high-quality headphones or monitors to ensure accurate sound representation. Utilizing EQ and compression plugins can also help balance and enhance the overall sound of your mix. Don’t be afraid to experiment with different effects and techniques, but be mindful of not overdoing it. Another key aspect is proper gain staging, which involves setting the levels of each track to avoid distortion and achieve a clean mix. With these tips and tricks, you can create polished and impressive tracks using your iPad for music production.
Collaborating with Other Musicians Using Your iPad: Tools and Techniques
Music collaboration has never been easier thanks to the iPad. With its portability, touch interface, and powerful apps, you can easily work together with other musicians regardless of your location.
One app that stands out for collaborative music production is Audiobus. This app allows you to connect multiple music apps together so that they can share audio between each other. You can use it to record a synth line in one app and then send it straight into another app for further processing or mixing.
Another great tool for collaborating on music projects is *Dropbox*. By storing your project files in Dropbox, you can share them with other musicians instantly no matter where they are located in the world.
In addition to these tools, social media platforms like Facebook Groups and Reddit communities dedicated to music production provide opportunities to find collaborators who have similar interests or skills.
Finally, when collaborating online using an iPad, make sure you have a fast internet connection and consider using headphones instead of speakers to minimize any latency issues during live sessions.
By utilizing these tools and techniques when working on collaborative music projects with your iPad, you’ll be able to create amazing tracks without having to face restrictions based on distance or time zones.
Taking Your iPad Music Production to the Next Level: Advanced Techniques and Strategies
Advanced Techniques and Strategies for iPad Music Production
For those who have mastered the basics of music production on the iPad, there are a variety of advanced techniques and strategies that can take your tracks to the next level. One key strategy is to experiment with different sound design techniques, such as using granular synthesis or creating custom effects chains in apps like AUM or Audiobus. Another important technique is to incorporate live instrumentation into your tracks, whether it’s recording guitar or bass directly into your iPad using an audio interface, or using MIDI controllers to trigger virtual instruments.
To add more depth and complexity to your tracks, consider exploring advanced mixing and mastering techniques. This could include using sidechain compression to create space in your mix, or experimenting with parallel processing to add more warmth and character to individual tracks. Finally, don’t be afraid to push the boundaries of what’s possible with the iPad as a music production tool. With new apps and accessories being released all the time, there are endless possibilities for creating unique and innovative music on this versatile device.
In conclusion, the iPad has revolutionized the way musicians approach music production. With its powerful hardware and an ever-growing library of music production apps, the iPad has become an essential tool for both amateur and professional musicians alike. By choosing the right iPad model, downloading essential apps, optimizing your setup, and collaborating with other musicians, you can take your music production skills to the next level. Don’t hesitate to explore our other content for more tips and tricks on how to make the most out of your music production setup. Keep grooving!
