Are you looking for tips and tricks to get the most out of your audio system at live shows? We have put together graphic equalizer settings for live sound. Do you want to know how to achieve the best sound quality for your performances? If so, then this is the blog post for you! In this article, we will be discussing the 9 graphic EQ settings that can help you achieve brilliant audio quality in live shows. Read on to find out how you can get the best sound possible for your next performance!
Preparing to Set Your Equalizer for a Live Show
When you’re ready to start setting your equalizer for a live show, there are a few things to remember. First, make sure your audio levels are properly balanced. Second, use the graphic EQ settings below to get the most out of your sound. And finally, experiment with different settings to find what works best for your show.
*Balance Your Audio Levels*
Before you can start tweaking your EQ, you need to make sure your audio levels are properly balanced. This means that each channel is at the same volume level. To do this, use your audio meters to monitor each track and make any necessary adjustments.
*Use Graphic EQ Settings*
The graphic EQ settings provided below will help you get the most out of your sound. Experiment with different settings to find what works best for your particular show.
*Tweak as Needed*
If you find that something isn’t sounding right, tweak the settings as needed until you get the sound you’re looking for. Remember, there is no one “perfect” EQ setting for every show. It’s all about finding what works best for you and your audience.
Optimizing Your Frequency Ranges Through Graphic EQ
When it comes to optimizing the frequency ranges of your sound, you can use a graphic equalizer (GEO) in conjunction with specific settings on your audio interface. By narrowing down the bandwidths and boosting or cutting specific frequencies, you can create a more tailored and optimal listening experience for each individual instrument or vocal line.
Below are nine EQ settings that will help give your live performances a boost in clarity and definition. Adjust these as needed to best suit your sound mix – and remember to always test in advance!
Selecting High-Pass and Low-Pass Filter Settings
When it comes to audio processing, one of the most common tasks is to adjust the gain and frequency ranges of a sound. This is often done using a graphic equalizer (Graphic EQ), which can be found in most music production software. There are many different types of EQs, but all of them work by altering the frequencies of a sound.
The most common type of EQ is the high-pass filter, which removes frequencies above a certain point. This can be used to remove unwanted noise or vocals from a mix, or to boost certain frequencies to make them more prominent. The high-pass filter can also be used to remove unwanted frequencies from a guitar signal, for example, to make it more clean and clear.
The low-pass filter works in the opposite way. It removes frequencies below a certain point, which can be used to reduce the amount of noise in a mix or to smooth out rough edges in a sound. Low-pass filters can also be used to remove unwanted frequencies from a guitar signal, for example, to make it more tonally rich and harmonically rich.
There are many different types of EQs, but all of them work by altering the frequencies of a sound. When selecting an EQ setting, it’s important to consider the type of sound you’re trying to achieve.
For example, if you’re trying to remove noise from a mix, you might want to use a high-pass filter. If you’re trying to make a guitar signal more tonally rich and harmonically rich, you might want to use a low-pass filter.
Utilizing Presets vs Manual Tuning with Graphic EQ
When it comes to fine-tuning audio quality in live shows, there are a few different ways to go about it. One option is to use presets, which can be automatically configured based on the type of sound being outputted. Alternatively, you can manually tune each frequency band using the Graphic EQ settings. Whichever method you choose, make sure to use the right presets or manual tuning for the type of sound you’re trying to achieve.
Visual Clarity: How To Read A Graphical EQ Display
Understanding the Basics of Graphic EQ Settings
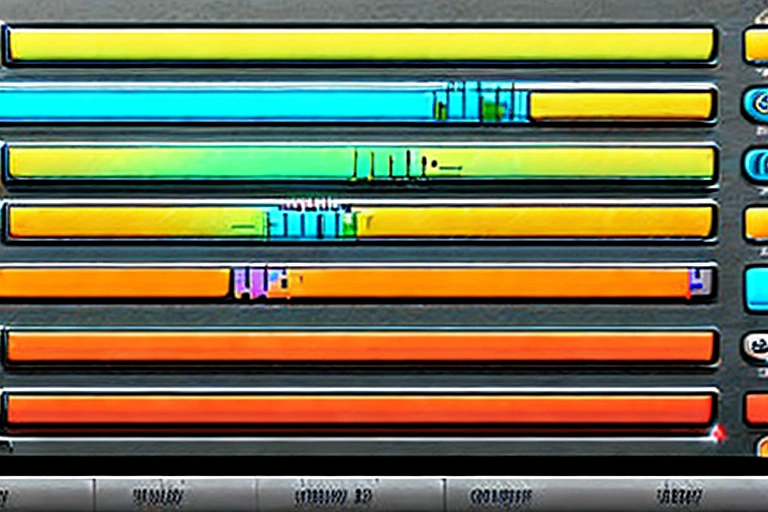
Visual clarity is key when tuning your audio system, and one of the best ways to achieve it is through the use of a graphical equalizer. A graphic equalizer displays frequency bands on a graph, making it easy to see which frequencies are being boosted or lowered. In this article, we’ll look at nine graphic EQ settings that will give you brilliant audio quality in live shows.
Before we get started, it’s important to understand the basics of graphic EQ settings. Each band on the graph represents a certain frequency range, and by adjusting the settings in these bands, you can adjust the sound quality of your audio system.
-
Low-Mid Band: This band is responsible for boosting frequencies in the low-mid range (between 50Hz and 1 kHz). By boosting these frequencies, you can produce a more powerful sound.
-
Mid-High Band: This band is responsible for boosting frequencies in the middle range (between 1 kHz and 2.5 kHz). By boosting these frequencies, you can produce a crisper sound.
-
High-Mid Band: This band is responsible for boosting frequencies in the high-mid range (between 2.5 kHz and 5 kHz). By boosting these frequencies, you can produce a brighter sound.
-
Upper Freq Region: This band is responsible for raising all frequencies above 3kHz. by adjusting this setting, you can help to reduce background noise and improve clarity of your audio signal overall.
-
Lower Freq Region: This band is responsible for lowering all frequencies below 3kHz. by adjusting this setting, you can help to reduce background noise and improve clarity of your audio signal overall.
-
Band Pass: This setting allows you to adjust the frequency range of the graph, allowing you to boost or lower specific frequencies without affecting others.
-
Q-Factor: This setting determines how wide the frequency range is on the graph. A higher Q-Factor means that the range is wider, while a lower Q-Factor means that the range is narrower.
-
Gain: This setting determines how much power the equalizer will add to the audio signal. By increasing this setting, you can boost the volume of the audio.
-
Low Pass: This setting allows you to adjust the frequency range of the graph, allowing you to boost or lower specific frequencies without affecting others.
Adjusting for Different Types of Music Genres
Visual clarity is key when it comes to understanding the effects of a graphical equalizer. By understanding how the various settings affect the frequency spectrum, you can adjust the EQ to provide the clearest sound possible for your music genre.
When adjusting a graphical EQ, it is important to keep in mind the type of music you are listening to. Rock, for example, tends to have a higher frequency range than classical music. This means that a rock EQ will be more aggressive in the lower frequencies, while a classical EQ will be more gentle in those frequencies.
It is also important to consider the room in which you are listening to music. A small room will naturally sound tighter than a large room, and an open floor plan will sound more open than a closed one. With these factors in mind, you can adjust the EQ according to your preferences.
Overall, to get the clearest sound from your graphical equalizer, it is important to understand the type of music you are listening to and the room in which you are listening. Once you have those basics down, adjusting the EQ will be much easier.
Tips for Achieving Maximum Audio Quality in Live Shows
Visual clarity is one of the most important factors when it comes to audio quality. If the audio is difficult to understand, it can significantly reduce the overall enjoyment of the show.
There are a few things you can do to improve visual clarity in your audio mix. First, make sure your speakers are properly calibrated. This will ensure that the audio is being reproduced accurately and will provide a consistent level of quality across all channels.
Next, make sure your graphic equalizer settings are optimized for live sound. This will help to improve the overall audio quality by allowing you to adjust specific frequencies to achieve the desired results.
Finally, make sure your audio levels are properly balanced. This will ensure that all channels are being reproduced at an equal level and will result in a more accurate audio mix.
Frequency Manipulation: Reducing Feedback in Live Sound Systems
Understanding the Basics of Graphic EQs
Live sound systems are notorious for feedback issues. A graphic equalizer can be a valuable tool in combating this problem. Graphic EQs provide controlled frequency adjustments that can help to reduce feedback and ensure consistent audio quality in live shows. There are nine commonly used graphic EQ settings that can enhance the brilliance of your recordings:
- Bass Boost: This setting will boost the frequencies at lower levels, helping to create a more powerful bass response.
- Treble Boost: This setting will boost the frequencies at higher levels, helping to create a brighter sound signature.
- MidrangeBoost: This setting will adjust the midsection of the audio spectrum, boosting or lowering frequencies depending on how you want to achieve your desired result.
- VolumeBoost: This setting will increase the overall volume of the audio output.
- Contouring: This setting allows you to adjust the level and shape of the frequency response curve, providing more control over how your sound is presented.
- Diffusion: This setting allows you to soften or sharpen frequencies in specific areas of the spectrum, creating a more realistic soundscape.
- Silencer: This setting will reduce unwanted noise in your recordings by lowering/muting certain frequencies.
- Saturation: Thissetting will add extra punch and clarity to your audio mix, ideal for songs with strong basslines or electric guitars.
- EqualizationFilter Q (or EEQ):Thissetting will apply a specific type of EQ to the entire frequency range, providing more flexibility in terms of specific frequency adjustments.
Tips for Setting Up Your Graphic EQs
One of the most common problems with live sound systems is feedback. Feedback occurs when one instrument or microphone sends a signal that’s too strong to other instruments or microphones in the system, causing them to amplify and create an oscillating sound. This type of noise can be incredibly distracting and annoying to audiences, so it’s important to find ways to reduce or eliminate feedback whenever possible.
There are many different ways to address feedback issues, but one of the simplest is by using digital equalizers (also known as graphic EQs). A graphic EQ allows you to adjust certain frequencies in order to reduce feedback signs. By default, most graphic EQs have several frequency bands that you can slide up and down along its frequency spectrum.
One of the most common types of feedback to address is snare feedback. Snare drums are usually set very close to each other, and when one hits the snare drum in front of it, it creates a sound that’s too loud and strong for the other instruments. By reducing the frequencies around the snare drum, you can reduce or eliminate this type of feedback.
Another common problem with live sound systems is guitar feedback. When a guitar player plays their instrument loudly enough, high-frequency notes tend to bounce off nearby walls andpipes and create an excessive amount of Feedback. By lowering the frequencies around particular notes on the guitar string, you can help reduce or eliminate this type of feedback.
There are many different ways to reduce or eliminate feedback in live sound systems, and by using a graphic EQ, you can achieve the best possible audio quality.
Identifying Frequencies to Enhance Live Audio Quality
Frequency manipulation is a common way to reduce feedback in live sound systems. By reducing the frequencies of feedback loops, you can reduce the amount of noise and distortion that is produced. Additionally, you can enhance the sound quality of certain instruments or voices by boosting specific frequencies.
To reduce feedback in a live sound system, you first need to identify the sources of feedback. This can be done by listening for unwanted frequencies that are being amplified and then reducing or eliminating those frequencies. Once you have identified the sources of feedback, you can begin to manipulate them by reducing their frequency or intensity.
There are a number of ways to reduce feedback in a live sound system. One common method is to use frequency modulation (FM). FM is a technique that uses a radio frequency (RF) signal to change the frequency of a feedback loop. By changing the frequency of the feedback loop, FM can reduce the amount of noise and distortion that is produced.
Another common method for reducing feedback is to use equalization (EQ). EQ is a technique that allows you to adjust the frequencies of different parts of a sound system. By boosting specific frequencies, you can enhance the sound quality of certain instruments or voices.
There are a number of different EQ settings that can be used to enhance live audio quality. One common setting is the treble boost setting. The treble boost setting is typically used to enhance the sound quality of high-pitched instruments, such as vocals or guitars.
Another common setting is the bass boost setting. The bass boost setting is typically used to enhance the sound quality of low-pitched instruments, such as drums or bass guitars.
Finally, you can use the tone control settings to adjust the overall tonal balance of a sound system. By adjusting the tone control settings, you can make sure that all parts of a sound system are balanced and consistent.
Frequency manipulation is a common way to reduce feedback in live sound systems. By reducing the frequencies of feedback loops, you can reduce the amount of noise and distortion that is produced. Additionally, you can enhance the sound quality of certain instruments or voices by boosting specific frequencies.
The 9 Essential Graphic EQ Settings
Graphic equalizers (GEs) are an essential tool for live sound systems, especially if you’re looking to reduce feedback. In this article, we’ll look at 9 GE settings that will help improve audio quality in live shows.
First and foremost, it’s important to understand that there is no one-size-fits-all approach to reducing feedback; each situation requires a different level of frequency manipulation. However, by following these tips, you can dramatically reduce feedback in most situations.
The first step is to identify the root cause of the feedback: is it due to improper signal routing or excessive levels? If the source of the Feedback is external (such as from a PA system), then fixing the external issue will usually solve the problem. If the Feedback is coming from within the system (such as from a microphone), then reducing the level of the offending audio will usually solve the problem.
*Use a Low-Pass Filter to Reduce High-Level Feedback*
A low-pass filter will reduce high-level feedback by attenuating frequencies above the filter’s cutoff point. This can be useful when reducing feedback from microphones or other high-level sources.
*Use a High-Pass Filter to Reduce Low-Level Feedback*
A high-pass filter will reduce low-level feedback by attenuating frequencies below the filter’s cutoff point. This can be useful when reducing feedback from loudspeakers or other low-level sources.
*Use a Combination of Low-Pass and High-Pass Filters*
A combination of low-pass and high-pass filters can be the most effective way to reduce feedback. By using both filters, you can target different frequencies simultaneously.
*Use a Dynamic EQ to Reducing Feedback from Loudspeakers*
A dynamic equalizer can be used to reduce feedback from loudspeakers by boosting frequencies below the speaker’s operating range. This can help to prevent the speaker from overloading and causing feedback.
*Use a Graphic EQ to Reduce Feedback from Microphones*
A graphic equalizer can be used to reduce feedback from microphones by boosting frequencies below the microphone’s operating range. This can help to prevent the microphone from overloading and causing feedback.
Use a Multiband Compressor to Reduce Feedback during Encore Parts
If feedback is becoming a problem during an encore part, it’s usually best to use a multiband compressor to reduce the level of Feedback before it becomes too loud. This will help to keep the audience engaged while the performer fixes any issues with their live audio setup.
*Use Noise Gate Settings to Eliminate Unwanted Audio Clipping*
Unwanted audio clipping (or ” POP “) can be caused by low-level signals that overpower higher-level sounds. By using noise gate settings, you can electronically remove these low-level clips from your sound mix. This can help to restore clarity and balance to your audio.
*Use Side-Chain Compression to Reducing Feedback from Other Instruments*
If Feedback is being caused by other instruments in the mix, using side-chain compression can help to reduce the level of that feedback. This will allow you to keep your sound quality high while limiting the levels of Feedback from other instruments.
Experiment with Different Settings until You Find Ones That Work Best for You
By following these tips, you’ll be able to improve audio quality in live shows without having to resort to drastic measures like reverb or echo. Experiment with different settings until you find ones that work best for you and your specific situation.
Creative Effects With Midrange Setting On Graphic Equalizers
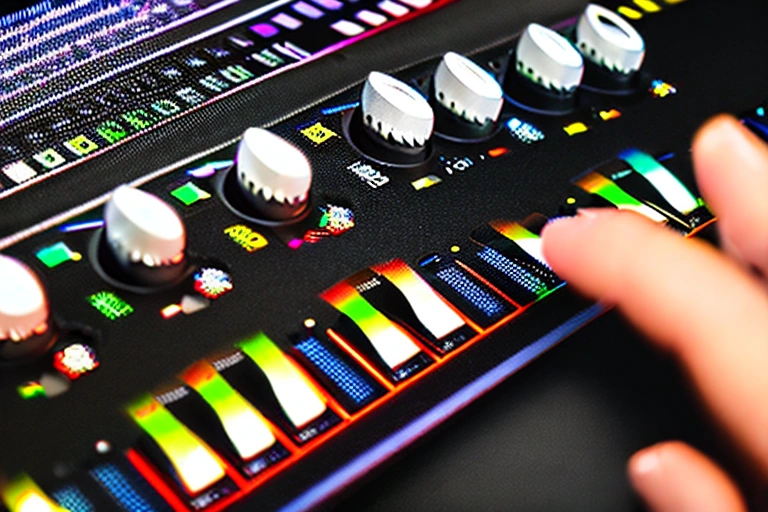
One of the most common uses for graphic equalizers is to adjust the tone and sound of a live sound mix. By adjusting the midrange setting, you can create a wide variety of creative effects that can add depth, brightness, and punch to your sound.
Below are nine midrange settings that can help you achieve different sounds in your live sound mix. Experiment with each setting and see what works best for your music.
Master Controls For Enhancing Overall Audio Quality on Stage
The graphic equalizers on most computers are great for shaping the sound of recordings, but they may not be as effective when used to adjust live sound. In this article, we’ll explore nine graphic equalizer settings that can give your shows a more brilliant audio quality. By using these settings, you will be able to optimize the tonal balance and frequency response of your live instruments while preserving the dynamics and clarity of your vocals and other sounds.
-
Highpass: When adjusting the highpass setting on a graphic equalizer, you will want to define which frequencies should be attenuated or cut off. This can help to improve clarity and tone within specific ranges, while also limiting any unwanted noises or tones from reaching your audience.
-
Lowpass: Use lowpass when you want to heavily filter out specific frequencies in order to flatten out or boost bass frequencies or lower trebles. This can affect the overall sound of your mix by emphasizing certain elements over others.
- Bandwidth: The bandwidth setting controls how wide a range of frequencies is affected by the EQ curve. Setting it too high may result in exaggerated brightness or harshness in parts of your mix, while leaving it too low may cause distortion or unwanted modulation effects at higher frequencies
Taking Control of Music Dynamics Using Dynamic Filters
While microphones and sound systems can give a great performance, there is nothing like the live experience to create an atmosphere that cannot be duplicated. When it comes to music dynamics, nothing beats the feeling of being able to adjust settings on stage in real time. There are many different ways to achieve this, each with its own set of pros and cons. In this article we will take a look at some of the most common dynamic-filter techniques and discuss their benefits and drawbacks.
Tips for Maintaining Audio Levels During Longer Gigs
Audio levels can be a major concern for any musician, regardless of their experience level. While it is important to be aware of your own volume levels and adjust accordingly, it is also important to be mindful of the audio levels of your bandmates and the audience.
Here are a few tips for maintaining audio levels during longer gigs:
-
Use a level meter. This is especially important for new musicians, as it can help them to keep track of their own volume and make sure that they are not over- or under-performing.
-
Use dynamic filters. These can help to keep the overall volume level consistent while allowing for variations in dynamics (i.e. loud/soft passages).
-
Use EQ settings. Depending on the type of music being played, different EQ settings may be necessary to achieve the desired sound quality.
-
Use earplugs/headphones. Not only will this help to reduce overall noise levels, but it can also help to preserve your hearing during long gigs.
-
Take breaks periodically. Even the most experienced musicians need a break from time to time; if you can, take a break during long sections of your gig that are particularly challenging or taxing on your ears/body.
Keeping Up With Technology Changes In Live Sound Engineering
Keeping up with technology changes in live sound engineering can be a daunting task. Thankfully, there are a number of online resources that make the transition easier. One such resource is Soundware.com, which offers an extensive library of audio and video software for use in live sound production.
Other sites that provide helpful information include Mixing Engineer Forums and Pro Audio Review. Whenever making any changes to your live sound workflow, be sure to test them out first on a small scale to ensure they don’t have negative unintended consequences on your audio quality or performance.
It’s clear that graphic equalizers are a powerful tool for live sound engineering, and with the right settings, they can help you achieve professional-quality audio with greater clarity and detail. We hope this guide has provided helpful insights into how to use these tools in order to get the best sound out of your system. If you want to learn more about live sound engineering, make sure to check out our other content!
